Introduction
The Data Extraction Starter is a pre-built project template that you can use to get started with Kodexa. It is a great way to get started with Kodexa and can be used to extract data from a wide range of documents.What’s the High-Level Approach?
The aim of the template is to provide a starting point for data extraction. It provides a pre-configured project with the following features:- A Processing Document Store for holding documents
- An Extracted Document Store for holding extracted data in a structured form
- An empty Data Definition that you can use to define the data you want to capture from documents
- An empty Data Form you can use to build a form based on your data definition
- A default task configuration that can be used with a simple task status lifecycle
- A default document status lifecycle
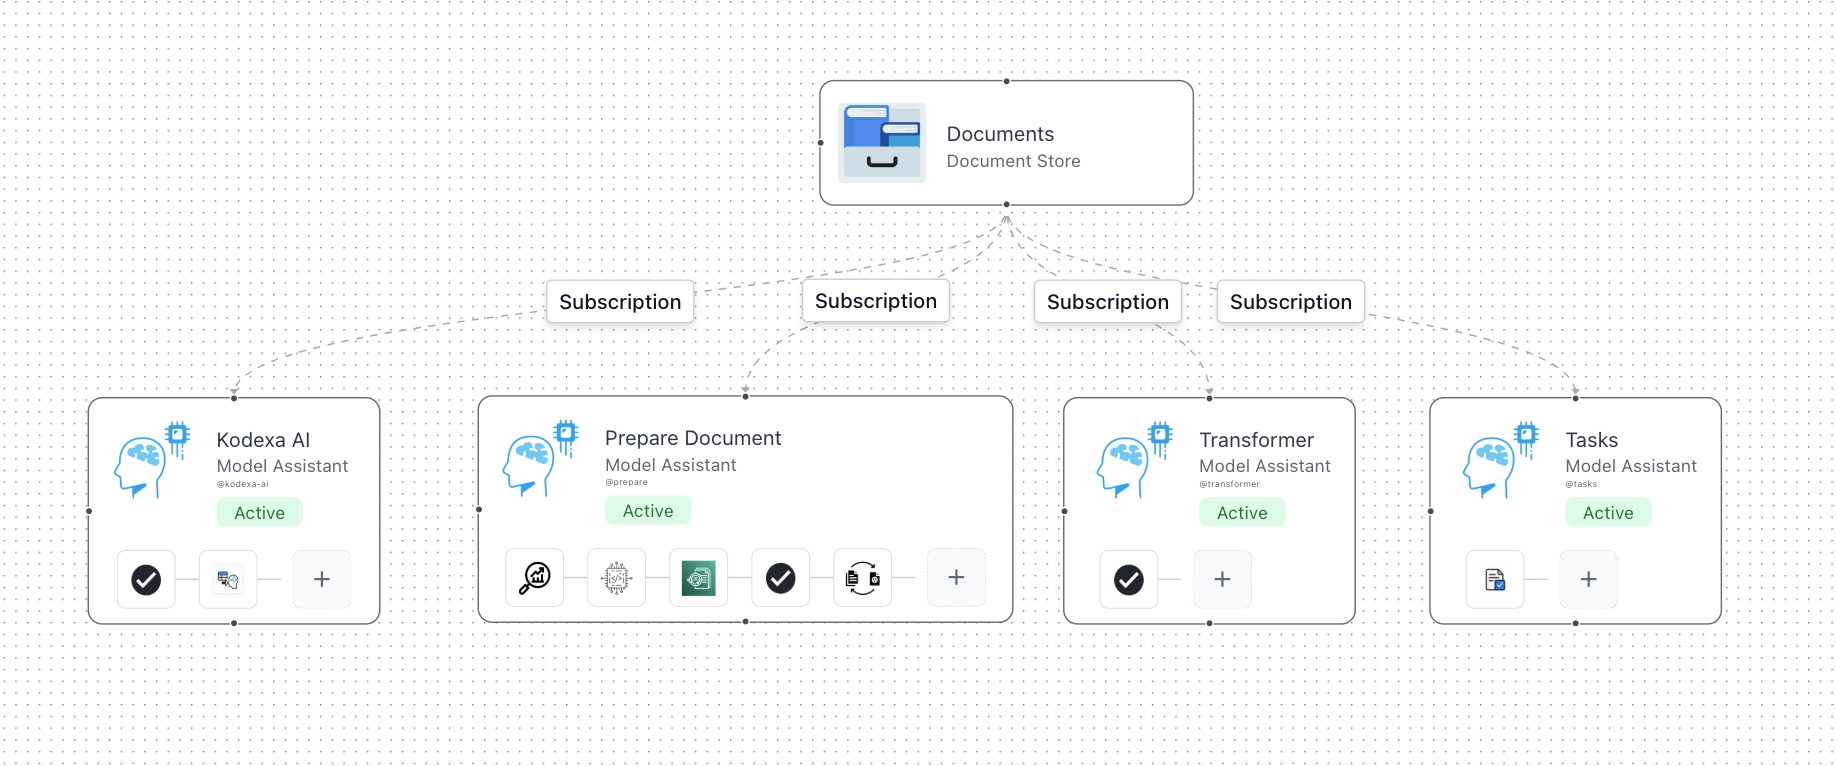
- A dataflow configured to use OCR, LLM-based Data Extraction, Validation and Task Creation
What is the basic flow?
A newly uploaded document will be processed by the following steps:- OCR is used to extract text from the document
- The text is then passed to an LLM-based data extraction model
- The extracted data is then validated
- If the data is invalid, a task is created to review the data
- The task is then reviewed by a human
- If the task is approved, the changed data is saved to the Extracted Document Store
- If the task is rejected, the changed data is saved to the Extracted Document Store
- The document is then marked as processed
Document Statuses
Each document can exist in one of the following statuses:Status Flow in Processing Pipeline
Default Data Flow
The default data flow is pre-configured with everything needed to get started.